Sometimes the parts of a project that seem most simple end up drifting towards a black-hole in its galaxy. That’s the way of the two seemingly most innocent pieces of my Elgin restoration — the head badge and my new nemesis the oilcloth Lobdell Emery saddle. Choosing to do the hard stuff up front, like straightening the forks, welding and finishing the frame, the seat restoration was to be a simple days work at most. Enter Murphy my namesake and his epigram — everything was and went wrong.
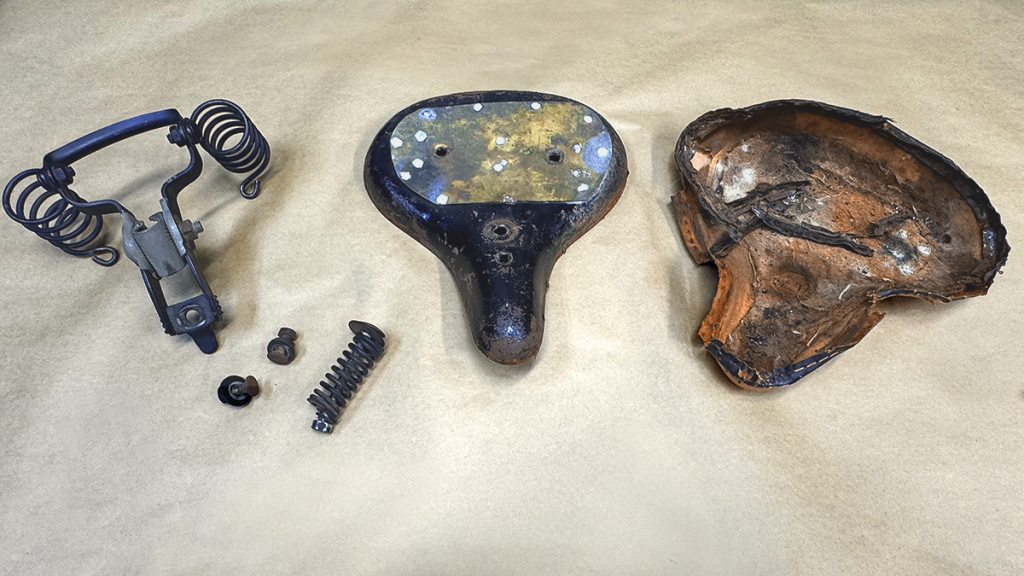
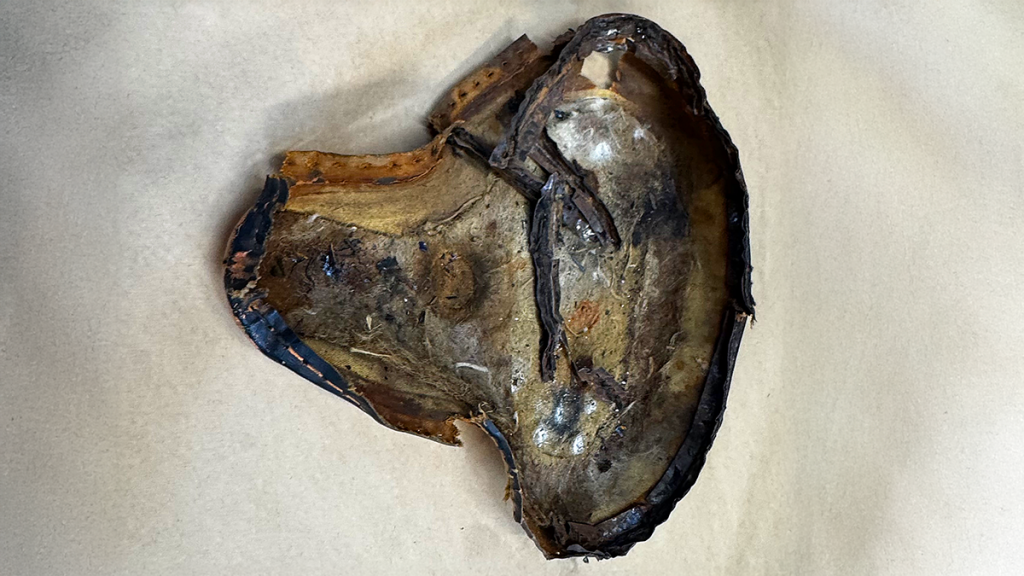
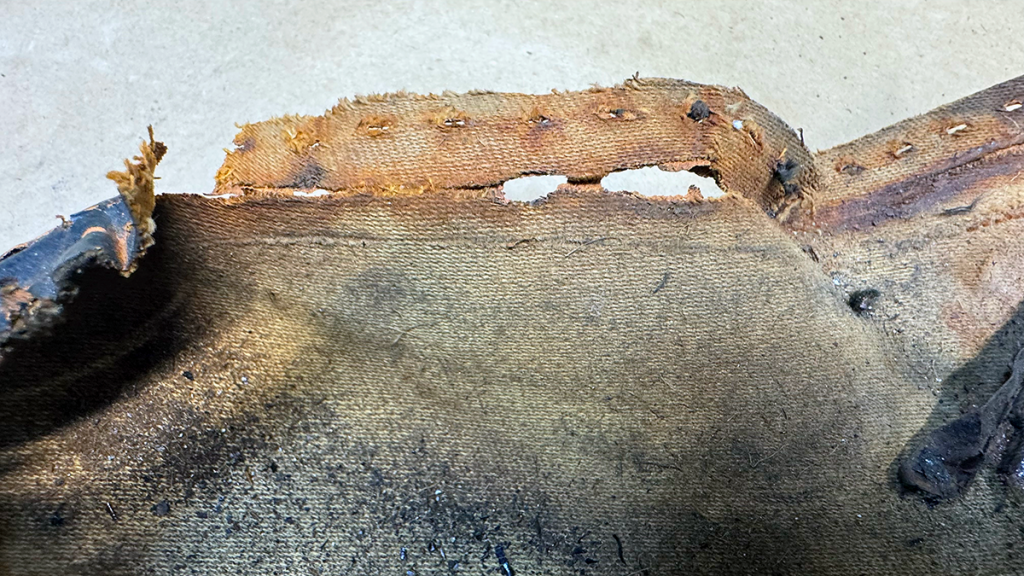
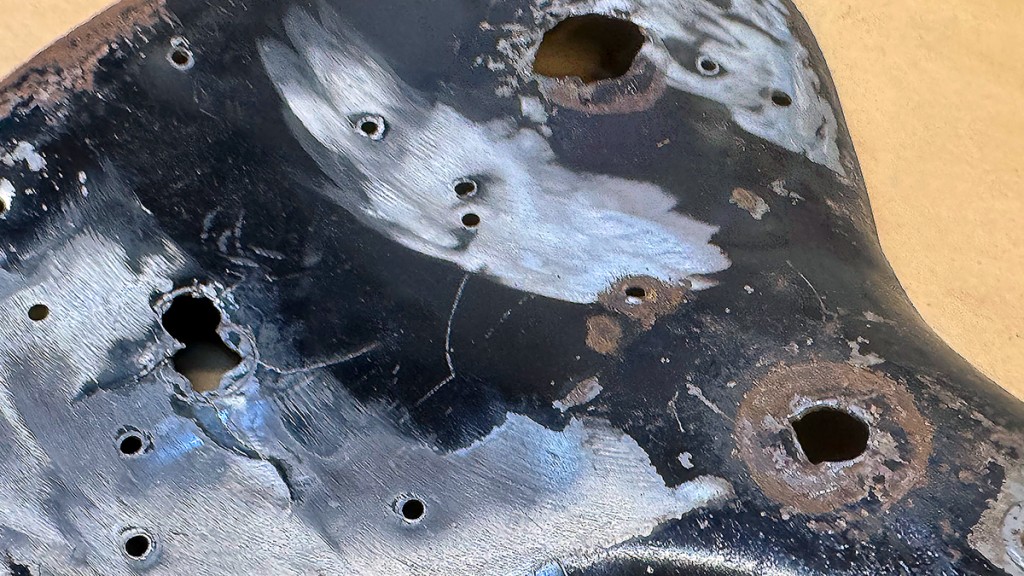
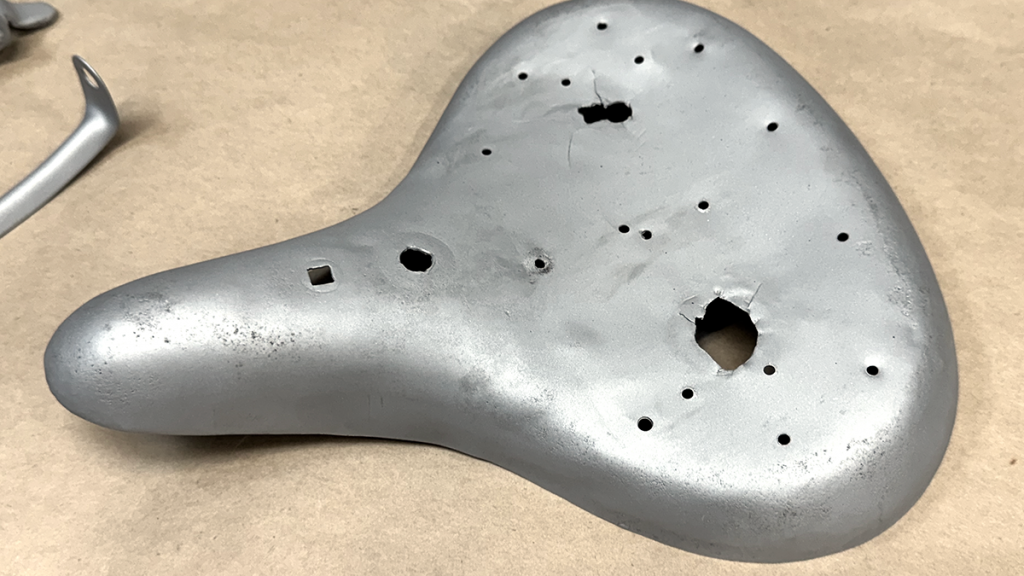
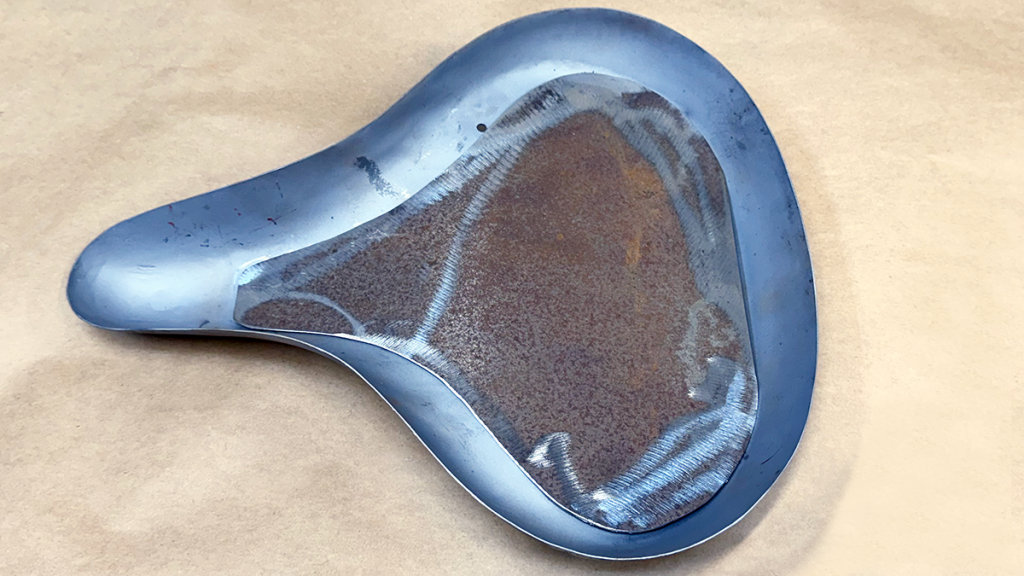
Originally my plan was to just tear off the old cover, then using it as a template cut a new one, freshen up and modernize the padding and reassemble with a leather cover. I wanted to stay somewhat true to the original but sourcing or recreating the oilcloth was task I couldn’t even begin to fathom. As you can see from the pictures below, this seat needed more than just a new cover. Removal of the cover first revealed that the metal banding that secures the cover was completely rotted. The cover is stitched to this band that is welded to the base. The band is then folded and crimped around and under the base, stretching it tight and holding it securely in place. But the big surprise was what followed next. Pulling off the remnants of the horsehair seat pad revealed the work of an owner past — someone had made a repair to remedy the failure of thin base metal at the spring mounts. Initially I assumed the square mounting holes for the carriage bolts had rotted and failed or were just over tightened and then twisted the steel til it broke in an already fatigued area. But I would later conclude it was more likely an oversized or overly enthusiastic rider’s bum that caused the fail.
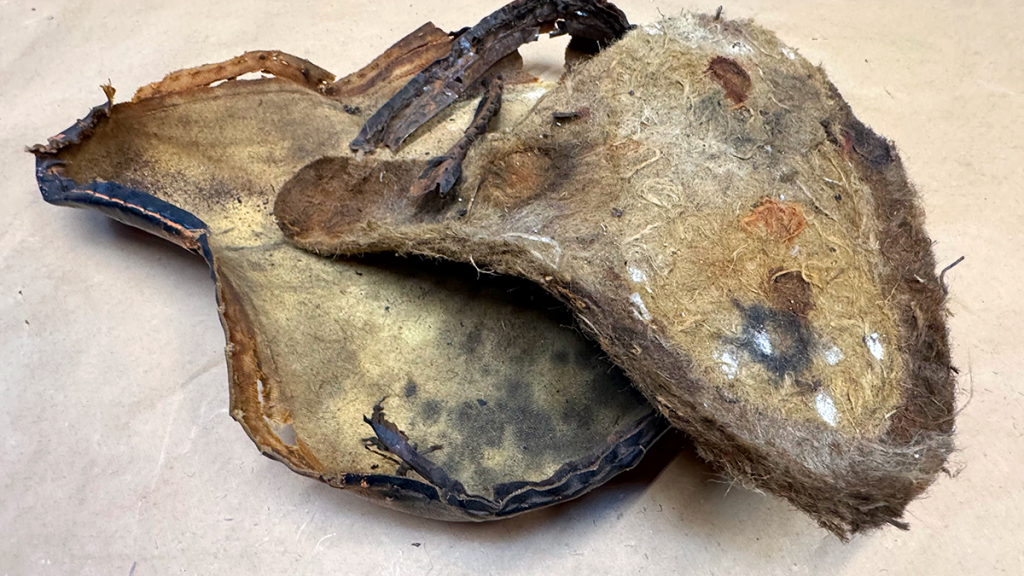
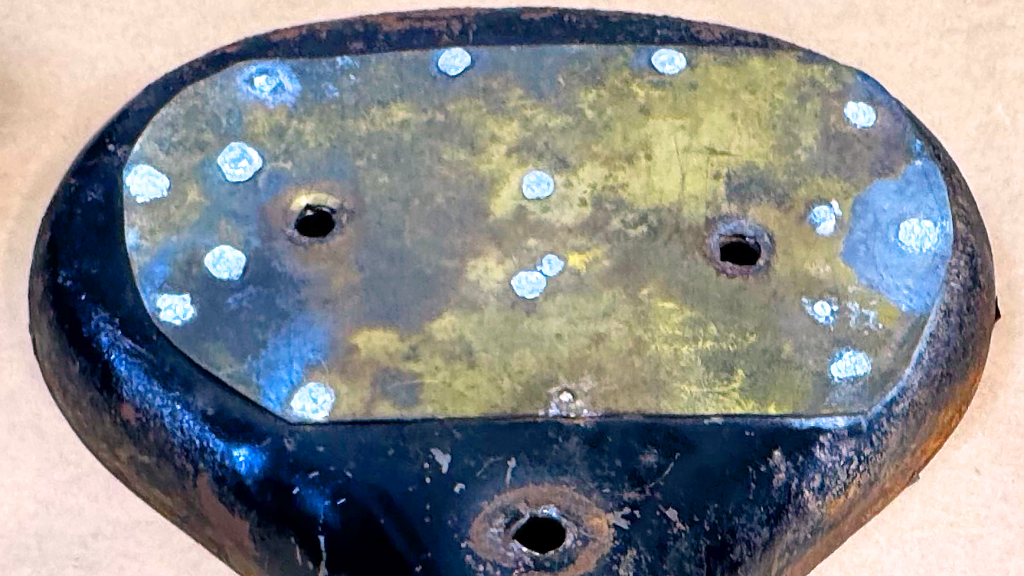
The extent of the damage was revealed when ground off the rivets holding the brass sheet that had been used to make the ineffective repair. The idea of using a brass sheet was both simultaneously brilliant and crazed, It was nicely shaped and conformed to the seat base with held tight with flush rivets. But the repairman’s logic that square wholes in soft brass would withstand the tightening torque of the seat bolts — was not meant to be sound, the holes may have survived for a short while, but definitely not long after a few rides they were certain to fail too.
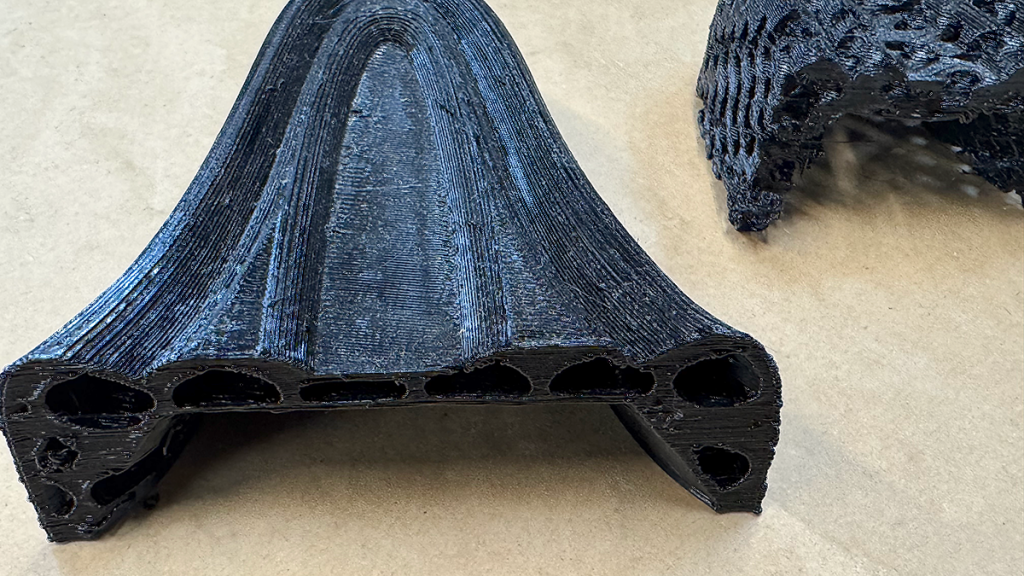
Seeing the extent of the necessary repairs, my first thought was an aftermarket replacement, a quick internet search turned up a plethora of fine substitutes of varied quality and cost. Next thought, find a used period correct saddle, but all of those available were pretty beaten up and would still need rehab to survive a bike that was going to be used not admired. Then the true DIY guy came out, how about a two for one — 3D print a TPU cover stiff at the base with inserts to accommodate the seat bolts and soft at the top to give a cushy ride, maybe.
So I decided to test out the printed concept, I scanned in the metal base and created my cover. Two iterations of varied volumetric lattices yielded a cushion / mount that even when covered was barely suitable for a tapered thin modern road bike saddle (stiff but soft enough). This idea would never work on a wide cushioned seat. A new saddle was not palatable for me, so no more back to the drawing board, I just moved on with the repairs. Simple enough it would seem, weld up the base, replace the banding, powder coat the parts, cut and shape some EVA foam padding and replace the cover — easy-peasy. But remember Murphy? He still hasn’t left the garage…
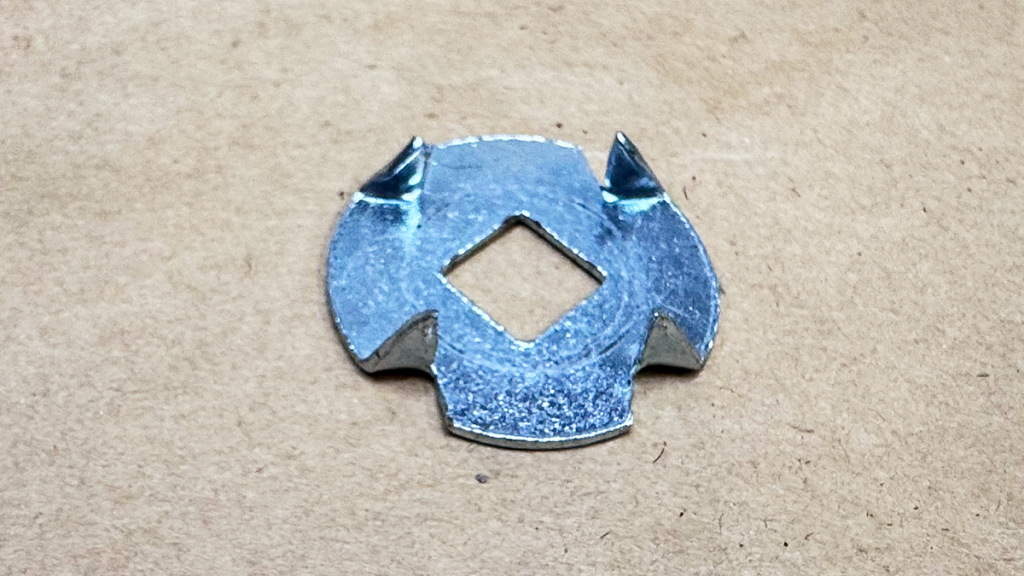
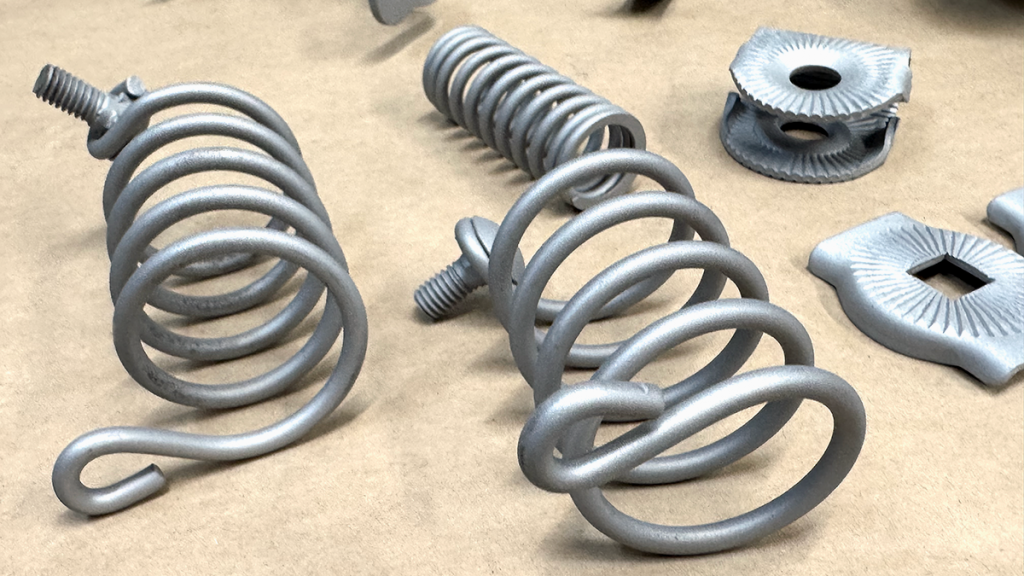
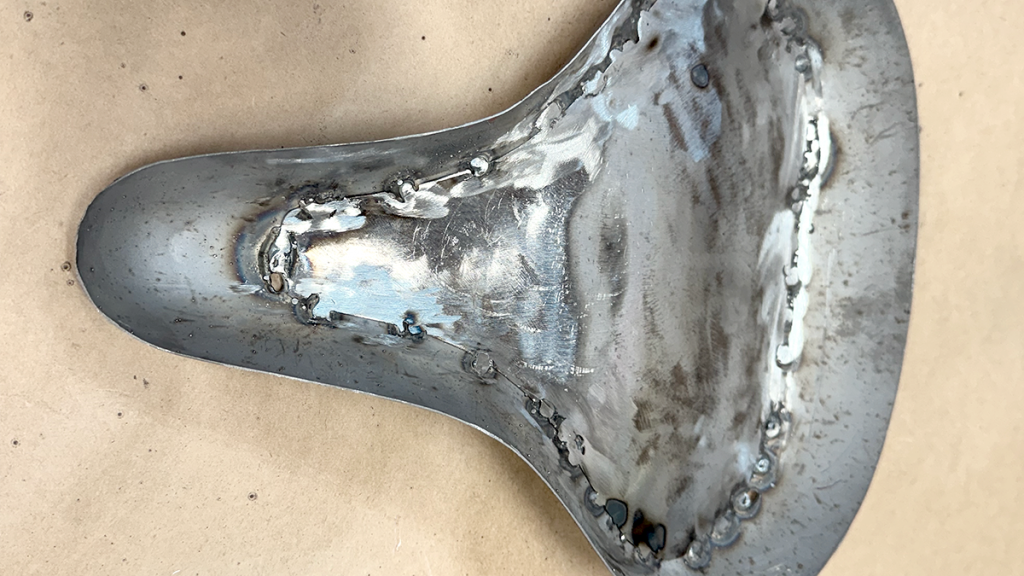
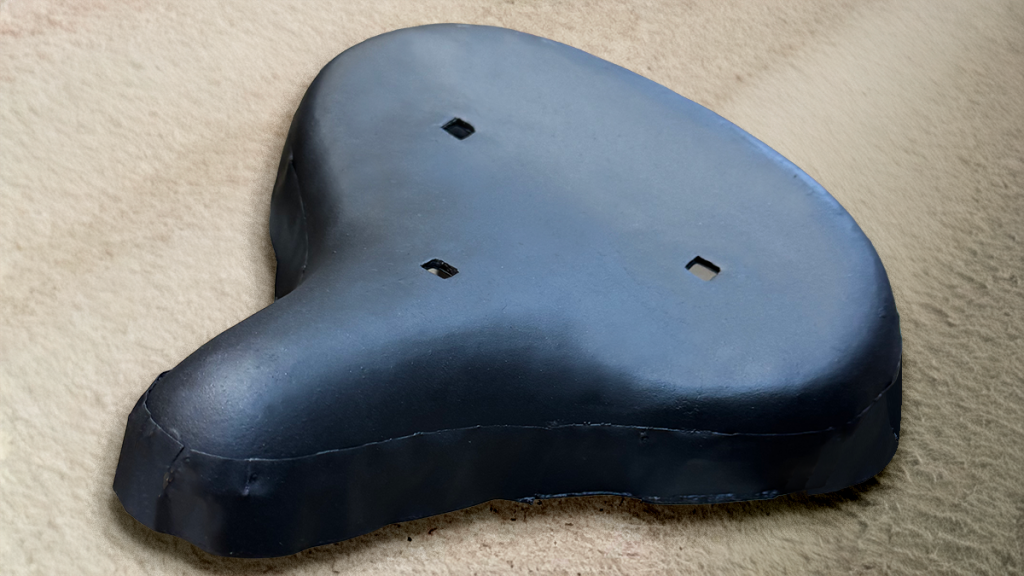
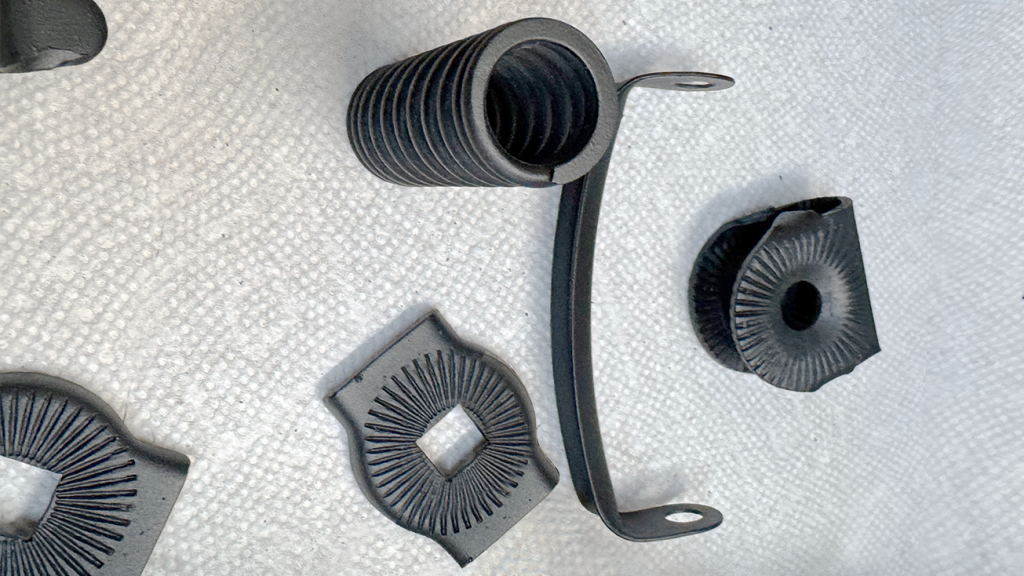
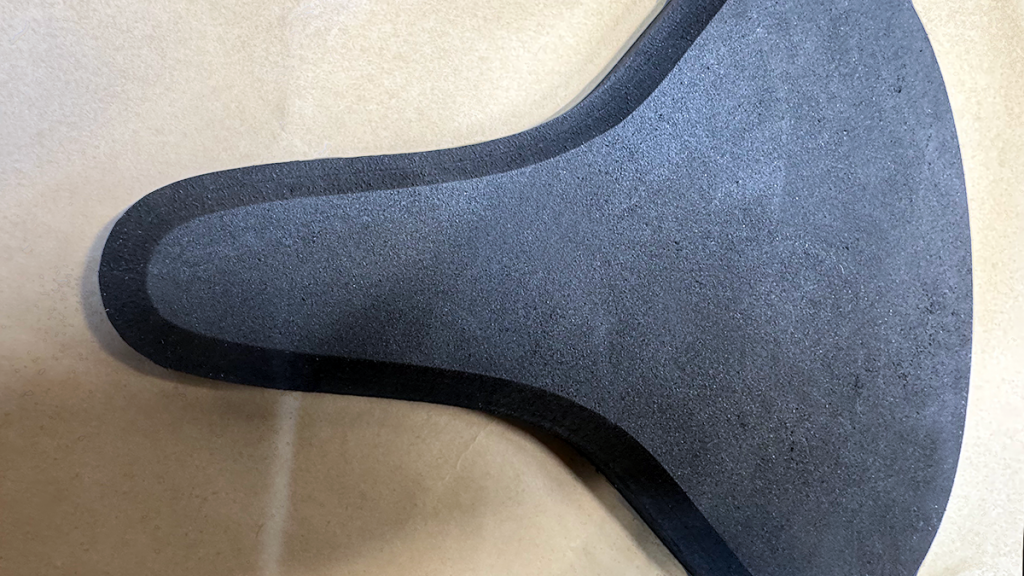
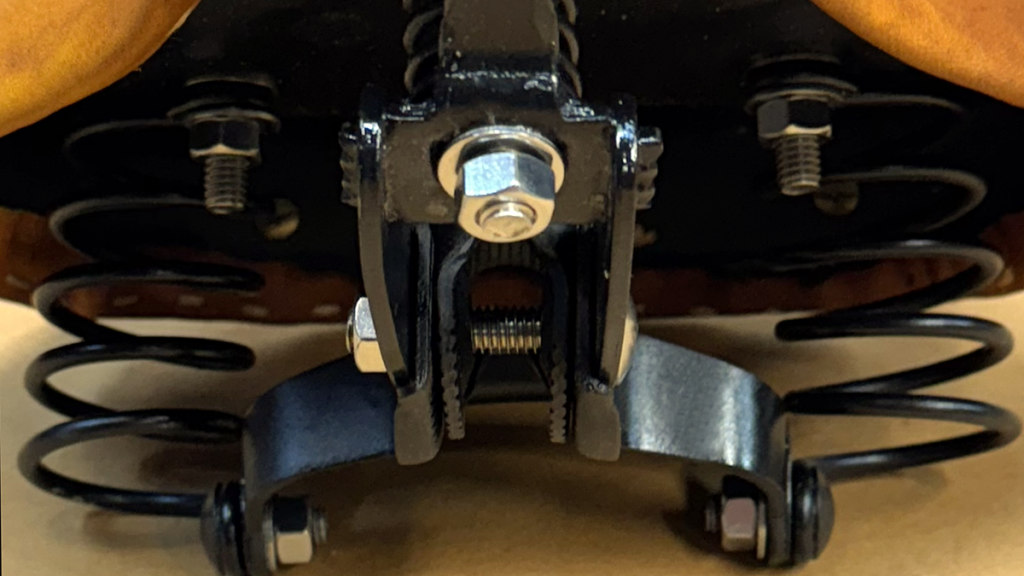
First order of business was to sand blast all the parts clean and then prepare the reinforcement patch for the seat pan. Using some pneumatic shears and body tools, I crudely shaped the patch out of .03” steel and prepped it for welding. Since the weak spots of the original pan were the square holes for the carriage bolts, I decided to create buttresses for them at the same time I was welding in the patch for the pan. To make it simple I used some pronged (prongs hammered flat) carriage bolt washers. After hammering out the imperfections in the original pan I welded everything up. For the record I’m a lousy welder, so grinding down the poorly executed welds did add some time. Next was spot welding the .001” low carbon steel band for securing the seat cover around the base of the pan. Once everything was done, another round in the blaster, an acetone bath, acid prep and some black powder coat finished the pan (springs and mounts at the same time, too). Now to make and shape the pad and the leather cover.

With some intimate knowledge of the age related thinning of my own backside’s padding, a substantial upgrade to the thin 1930’s horsehair pad would be required. I know that the children of the 30’s were the makings of our “toughest generation” but, butt leather is not an attribute I need to acquire this late in life. But enough butt, having learned that even my most pliable TPU creation was too stiff, it was back to modern basics — very shapable, readily available in many different densities and thicknesses — EVA foam. I decided on three layers, first a thin heavy durometer layer to cover the metal pan and protect the leather. A second softer thicker (.375”) layer to protect my aging bones. Lastly a denser but thinner layer to shape out “prostate contour” providing wear resistance and protect the softer center layer. Using the 3D scan data I created a plastic guide a then shaped the individual layers with a palm router. Talk about a job that should have been done on a router table with vacuum waste, this was it, cause my way made a giant mess. After some cleanup, I glued the top two layers together and set the shape of the thin bottom layer by draping the foam over the base and oven baking it for a few minutes. Padding finished, I moved on to the leather seat cover.
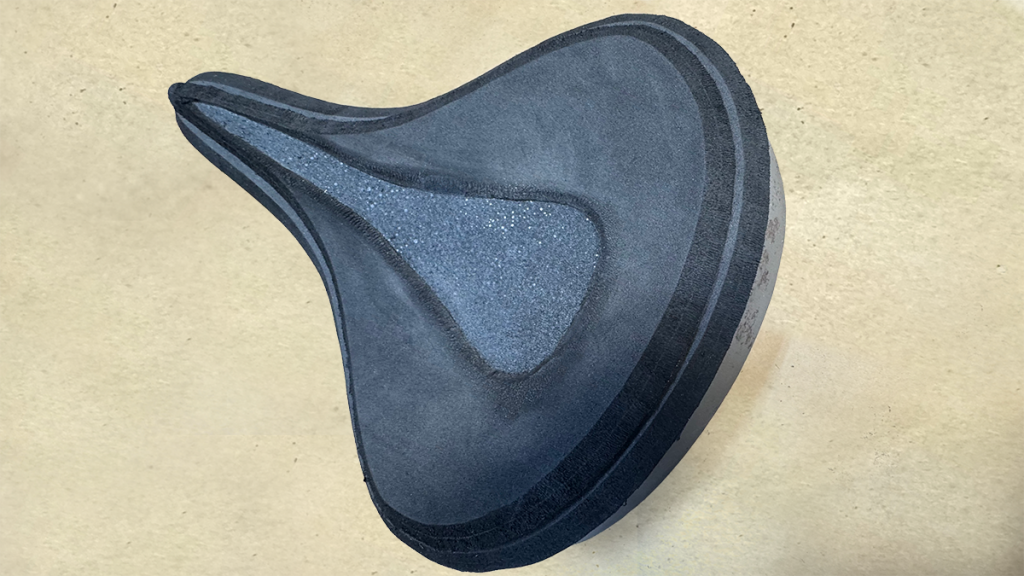
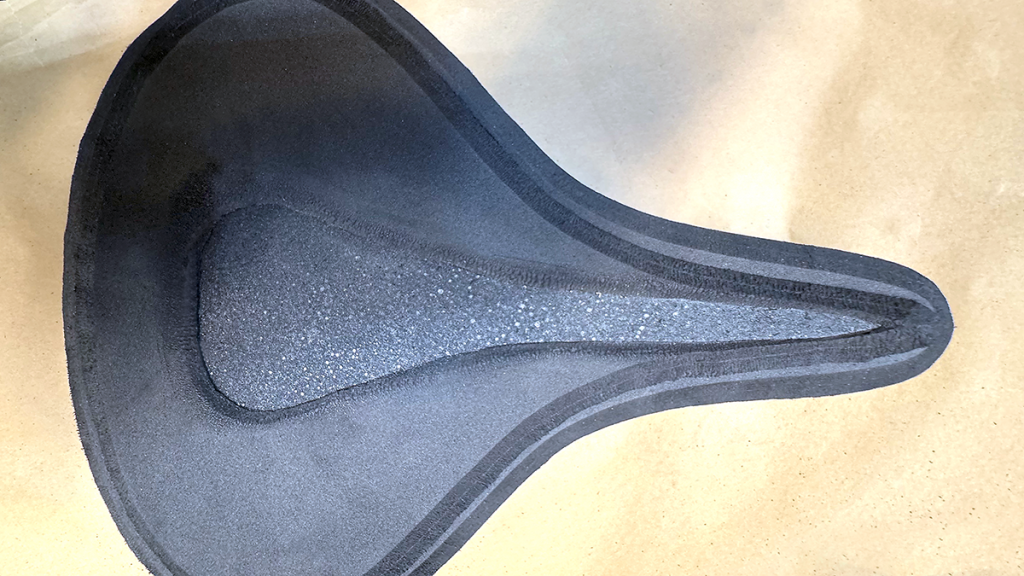
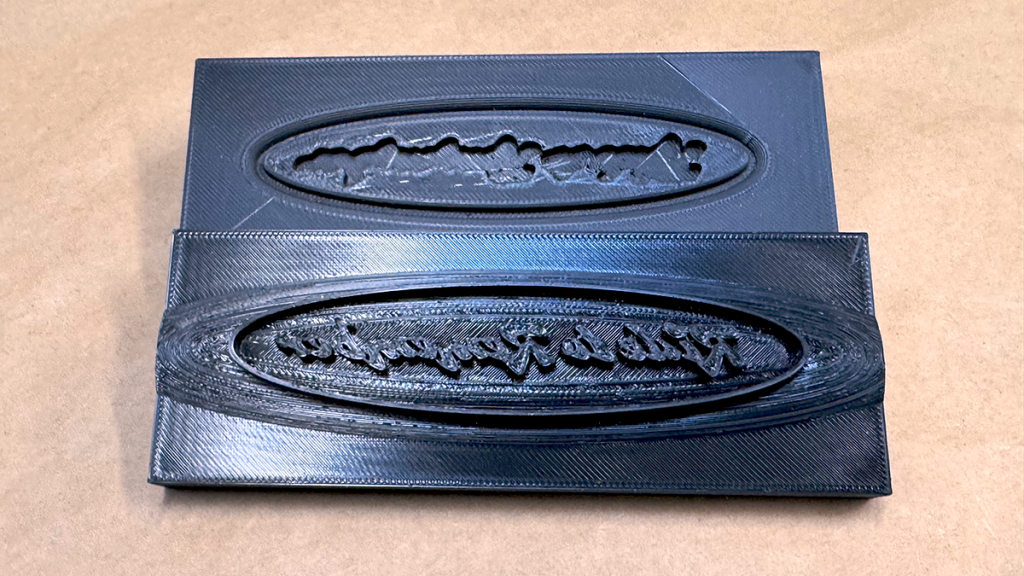
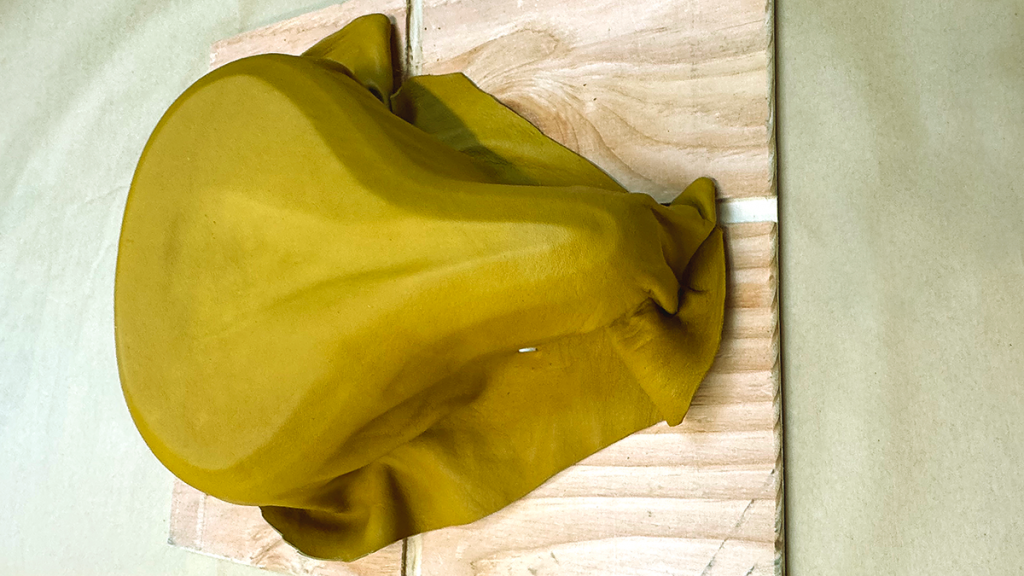
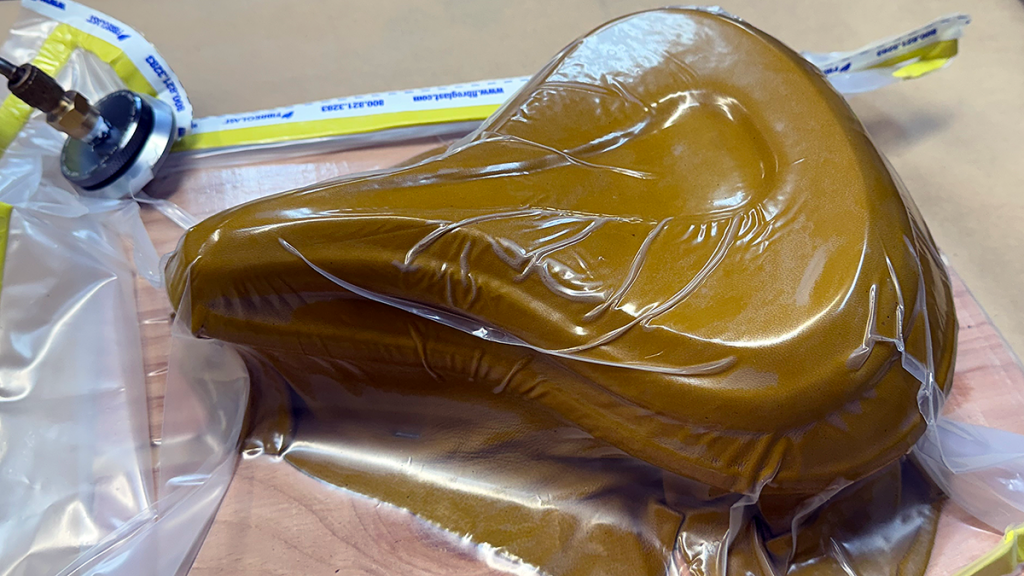
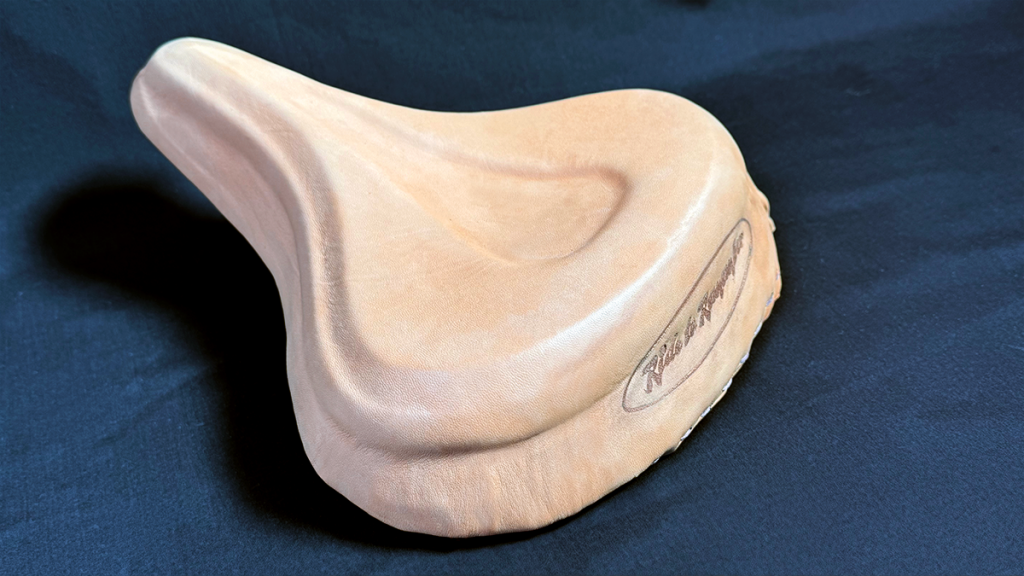
Once again, Amazon was an instant source for small inexpensive leather sheets. Since my colour theme was orange, I found some 12$ 1mm thick sheep skin that had a yelo-tan finish that I hoped to dye up to have a burnt orange look. After a rough trimming to size, I wet down the piece, placed it over the foam padding atop the seat base, stuffed it into a vacuum bag turned on the pump and applied some pressure. While the vacuum was drawing down, I used some soft wood to shape and stretch the leather to the foam. Once the leather took form, it was time for personalization, I had printed up a PETG punch and die set to stamp in the Ride to Remember logo, my thinking was to laser ablate the leather to darken the logo, then emboss it. Remember Murphy, he’s been making this rather a nightmare all along, but now he just became destructive. I over estimated the resilience of the sheep skin, though my punch and die were very rounded and their depth quite shallow, they none the less weakened the leather. There was no going back as I was already way to invested, so I forged ahead and assembled the seat.
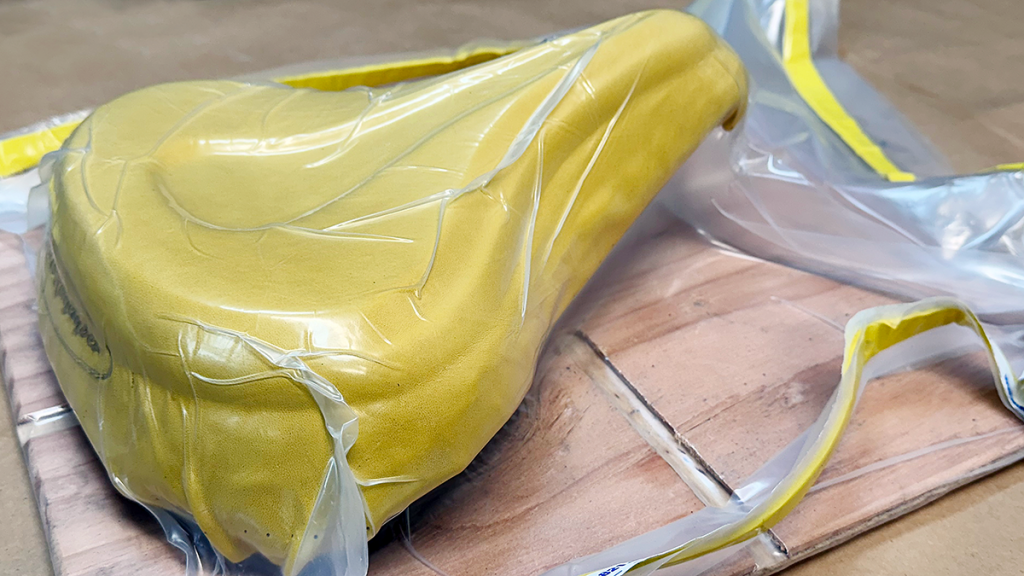
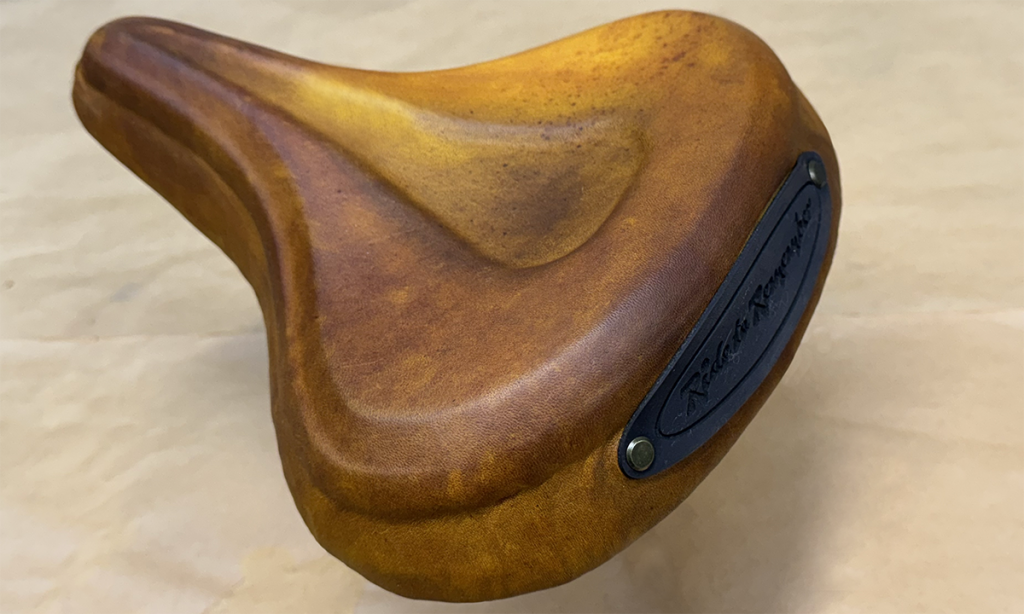
Gluing each layer of foam to the pan and finally the sheepskin cover to the foam, back in the vacuum bag it all went. After the glue set, it was time to stitch the leather to the metal band, believe it or not that was the easiest part so far. Then it was also surprisingly easy to fold over the banding and get that 1930’s factory look, well maybe not quite as polished looking as the original, but acceptable for a first attempt. Now onto dying the leather and fixing my failed embossing.
The dyes went on easily, but, even though I had thoroughly cleaned the leather there were still some spots where the surface resisted the dye. Airbrushing the dyes was my choice over using standard wool daubers. The fumes were intoxicating but the ability to blend a more aged look was well worth the loss of some of my remaining brain cells.
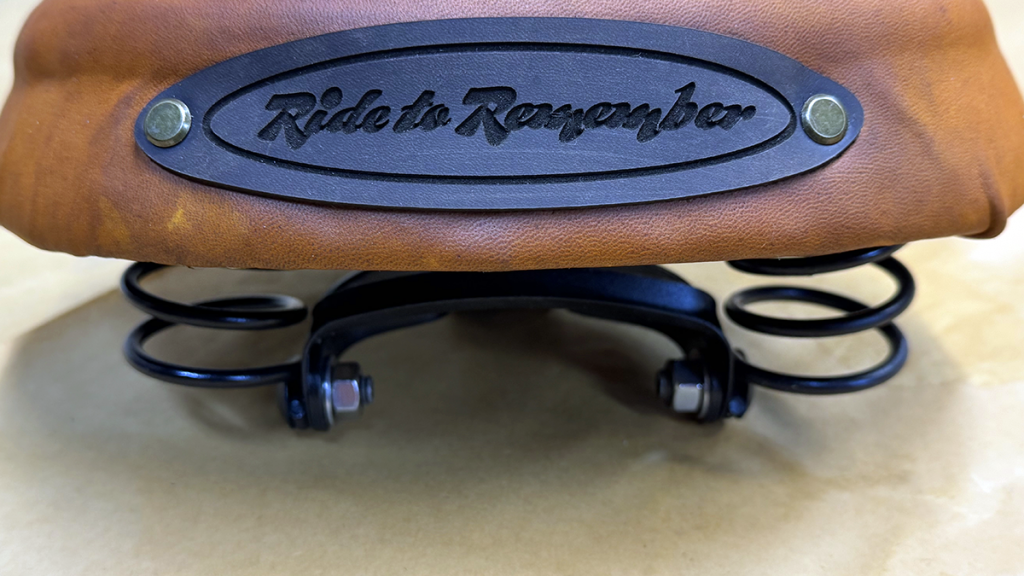
As for the failed embossing, sometimes hiding an unplanned error can work out as good or better than the original plan. This instance is one, I used a scrap piece of leather and laser engraved the logo into it, then trimmed it slightly larger than the original embossing attempt and riveted it onto the seat, masking my failure. If you didn’t know it, you think it was my plan all along.
Enjoy your ride.